

Japanese Tools
6 Days, For Beginners
Fall 2024
November 4-9
This six-day class will be a hands-on workshop focused primarily on the sharpening and setting up of traditional Japanese chisels and hand planes. These are foundational skills rooted in the Japanese tradition of woodworking yet can be readily applied to any genre of woodworking. The course will be packed with details that usually require a lengthy apprenticeship to learn. There's a lot to cover, so bring tools, hands, and be ready to work!
Please read Student Greeting from Dale Brotherton. It has important information about purchasing tools and making good decisions as well as specifics about chisels, planes, saw blades, etc. You'll find links to recommended tool dealers on the second page. Dale advises you purchase and/or acquire tools early.
You will be taught the fundamentals for setting up and using Japanese hand tools to cut traditional joints. This course is a prerequisite to Dale’s Japanese Joinery & Japanese Carpentry courses.
The course project will be a traditional style tool box with a slide-locking lid. Pre-milled materials will be provided.
In this six-day course, we'll start by tuning up your waterstones. We’ll then learn basic setup and sharpening technique on your own chisel. We cover removing and resetting the handle, fitting the handle ring, preparing the back, dealing with the hollow ground, blade angles and subtleties of honing with Japanese waterstones. Sharpening is done by hand with no guides in the traditional manner.
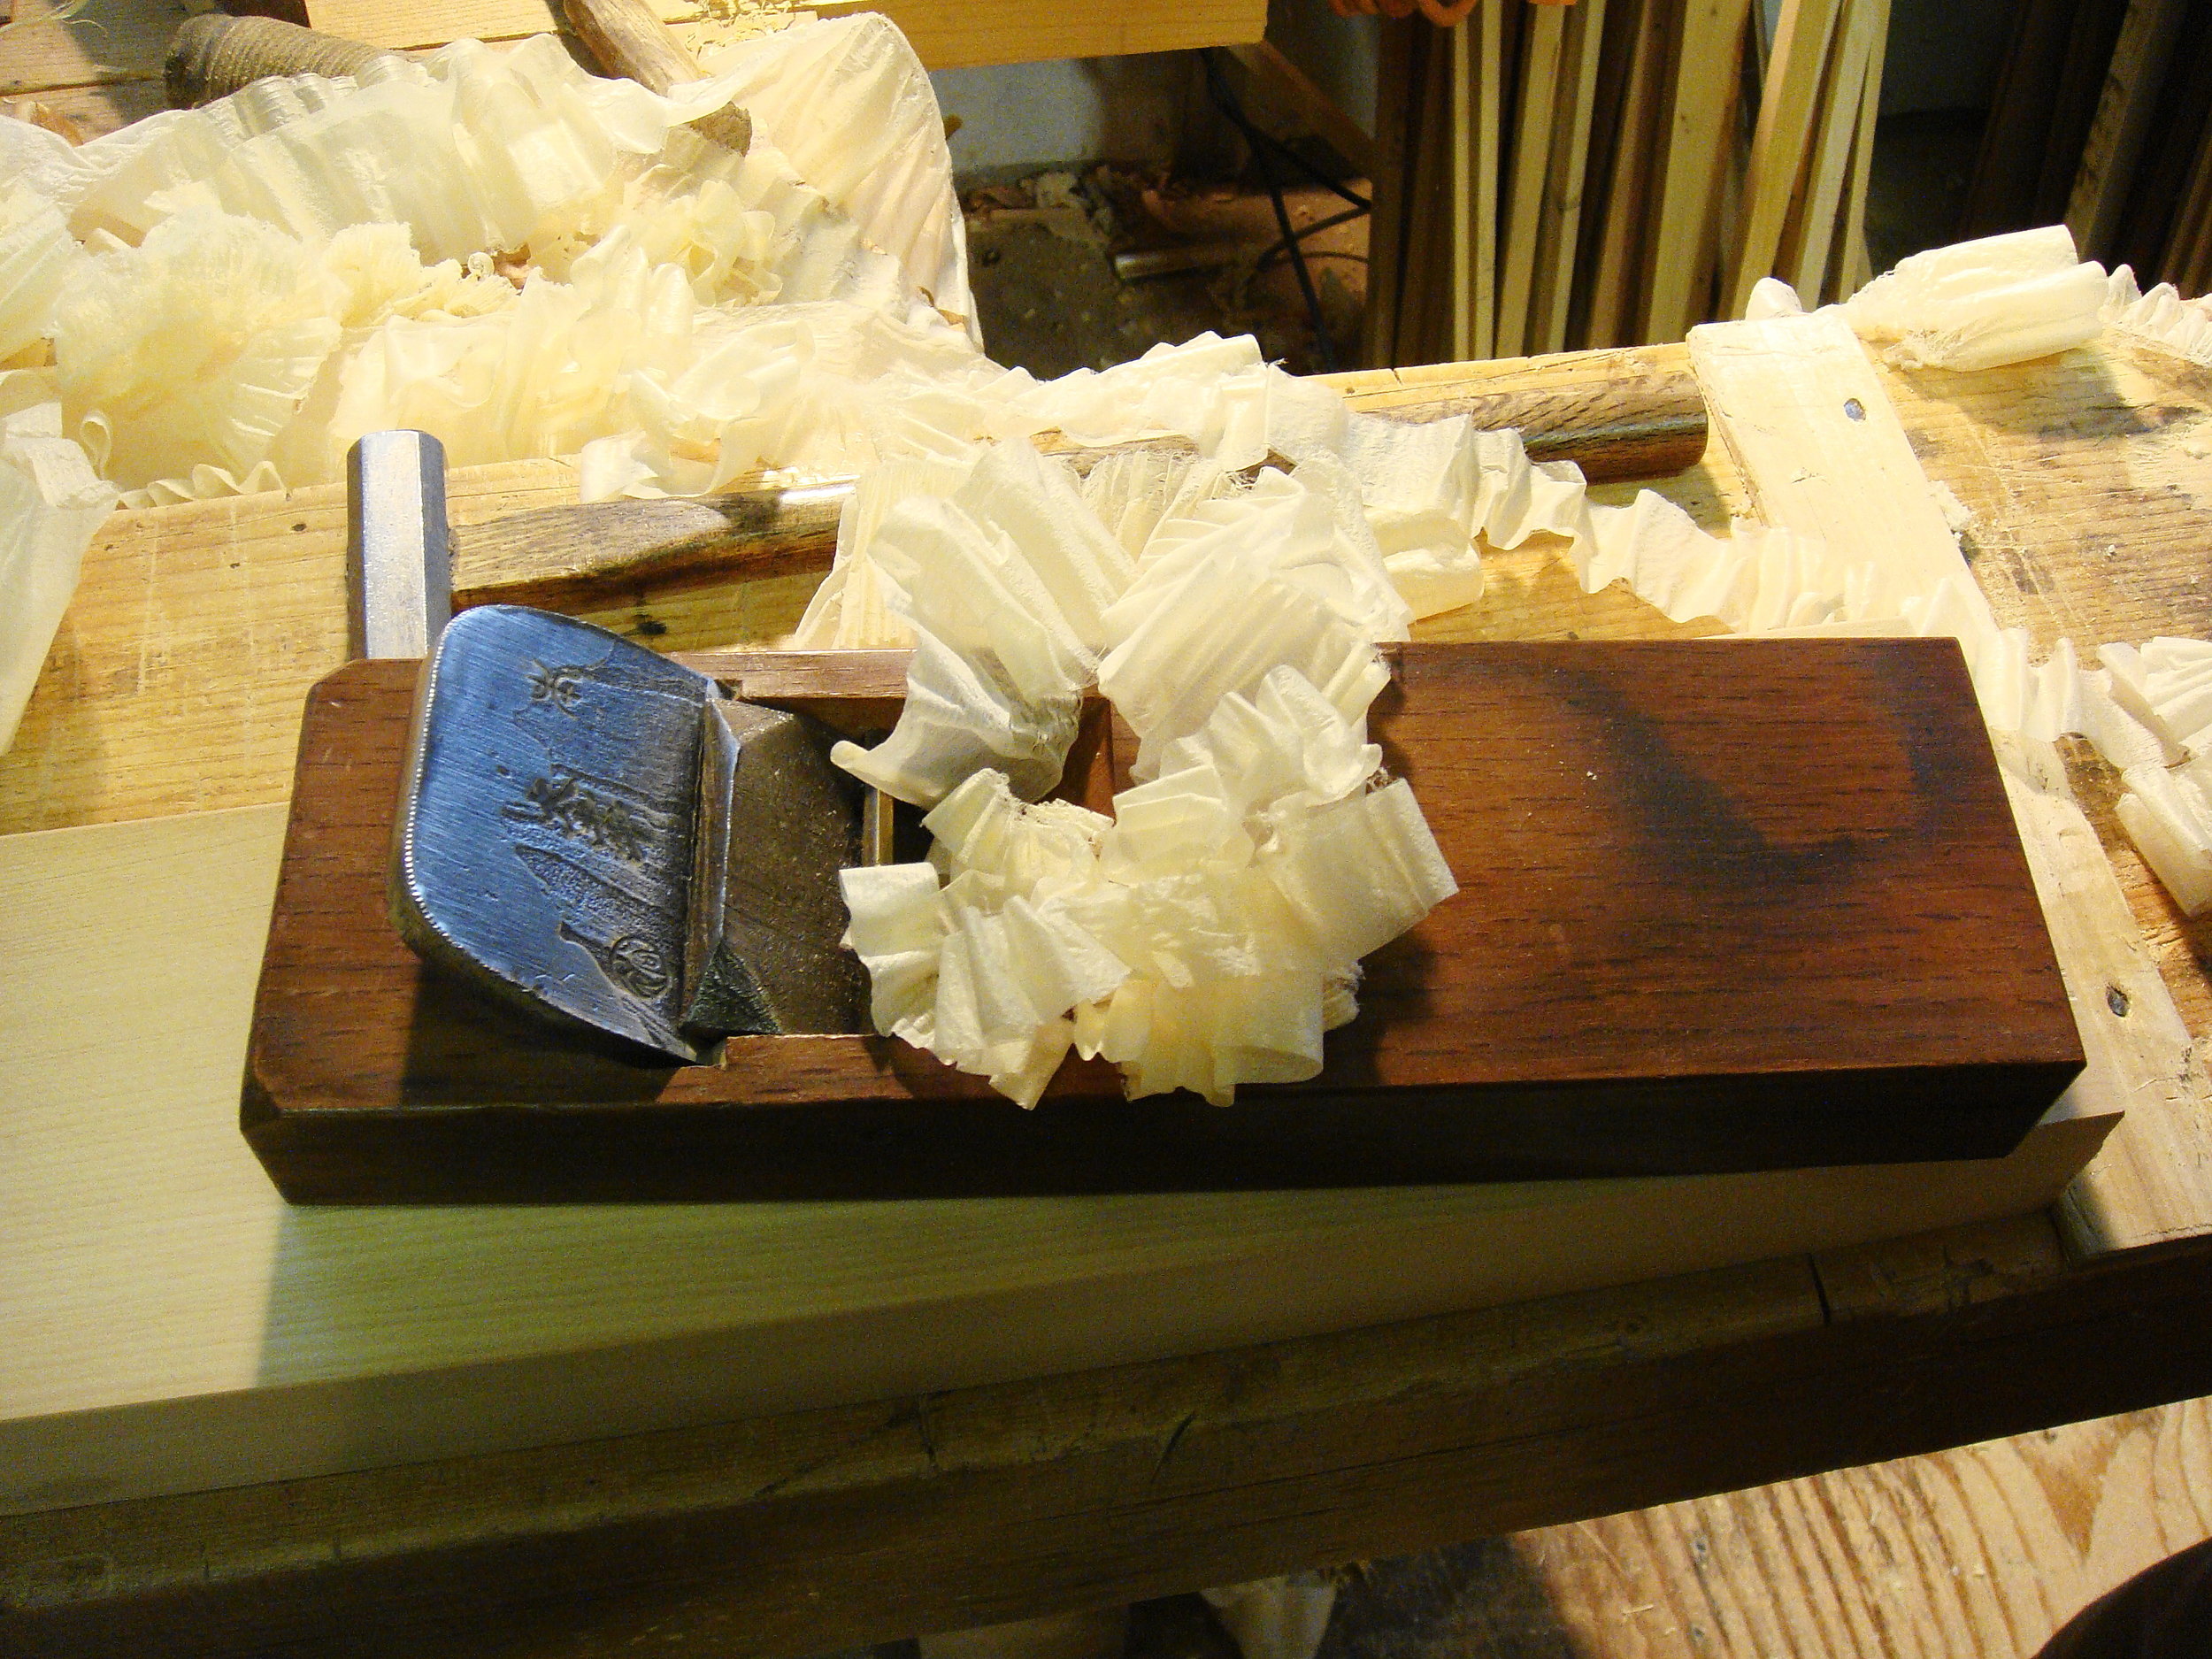
Next we move into the hand plane, first learning to flatten the back using the uradashi technique of forming the blade with a hammer and anvil. Then we’ll progress to honing on a steel plate for perfect accuracy, followed by finish sharpening and trimming the blade as necessary. Next the chip breaker is carefully shaped, honed, and fit to the main blade. With the blades ready, the block is trimmed as needed and fit with the blades. A scraper plane can then be set up and used to shape the plane base to the proper contours. Finally, we’ll learn how to micro-adjust the blade settings and make shavings!
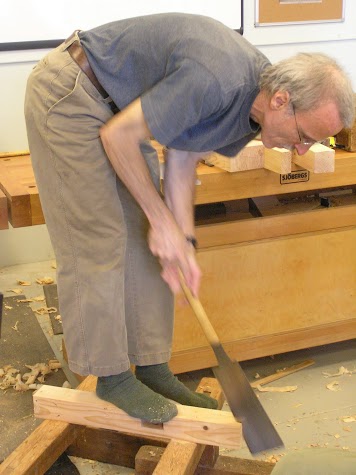
With our tools in shape, we begin discussing wood grain types and proper orientation. Then layout of parts for our project which includes wedged mortise and tenons. We'll cover basic chisel techniques while cutting out mortises by hand. After that, we'll use Japanese hand saws for cutting our tenons. Final trimming and tenon shoulder adjustments will come next, followed by hand planing to finish the surfaces. Lastly, we’ll assemble the parts, drive in wedges, and execute final trimming. Don't bring glue, you won't need it!
Note: Even though the tool box is a fairly simple project, setting up the tools and entirely hand woodworking goes slow for beginners. Therefore it is likely that students will go home with their project incomplete. In such cases, adequate instruction to finish at home will be provided.

Required Tools
Here is a link to the Japanese Class Tool List that you can print out. Please don’t hesitate to reach out with any questions about tooling for this course.
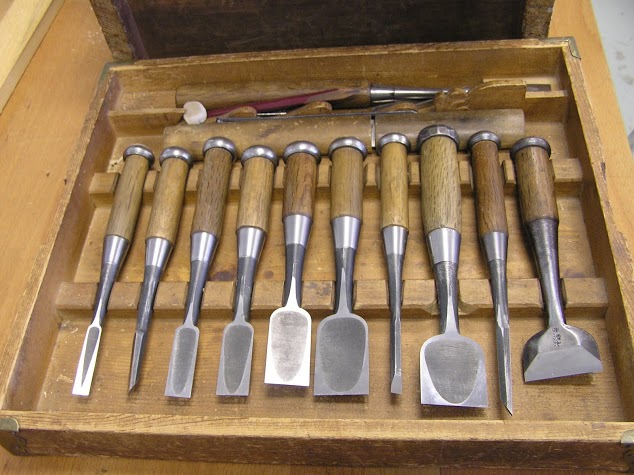
Chisels
12mm. Please ensure that at least one of your chisels is a new Japanese style in order to practice setting the handle ring.
Hand planes
1 new Japanese smoothing plane at least 50mm wide. The plane should have a laminated steel chip breaker. 70mm is standard and most useful, but a high quality narrower plane can often be gotten for less money. Western planes can be substituted, but less will be learned.
1 Japanese scraper plane (tachiganna). Wider is better, but at least 36mm. Note: this is an actual plane with a wooden block, not a hand held blade.
Saws
1 small 210mm ryoba (double-edged) saw. Alternatively, a medium sized ryoba 240mm plus a small crosscut dozuki (Japanese Backsaw) will be adequate.
Sharpening Tools
1 medium (1,000~1,500 grit) Japanese waterstone
1 finish stone (minimum 6,000 grit) Japanese waterstone
Small water bucket. There will be extras to use.
Hammers
1 medium size 375~550g
Layout Tools
Pencil
1 machinist style beveled straight edge minimum 12” long
Recommended Tools
Chisels
A wider chisel up to 36 mm will be very helpful
Sharpening Tools
1 coarse (120 to 600 grit) Japanese waterstone
220 grit wet dry sandpaper - at least 2 or 3 sheets
Kanaban. If you have one please bring!
Hammers
1 small size 100~250g. An octagonal head is most useful.
Other Tools
1 Square - a common tri-square, Japanese sashigane, or other type for layout is acceptable
A small round or ½ round metal file
Rags
If you are driving and have room, please bring any other hand tools that you would normally use.
Prerequisites
For beginners. This course will give you the fundamentals for setting up and using Japanese hand tools to cut Japanese joints. This course is a prerequisite to Dale’s intermediate Japanese Carpentry courses. You may satisfy this prerequisite if you’ve taken any of Dale’s courses at PTSW or any other school.
Note: This training is physical and demands a lot of the body. You'll be doing a great deal of hand sharpening which can tax finger, hand and arm strength. It’s also dirty. Sharpening paste can stain hands and clothes. If you have concerns, please reach out to us and we'll talk it through.
Course Information and Registration
Class runs from 9:00 am to 5:00 pm Monday through Saturday in Building 304 at Fort Worden. Map
Please read our What to Expect page for general information about the school.
Please also read our Registration Policy.
Sign up for the waitlist if the course is full.
Class size: 8
Cost: $1,075
Materials Charge: $100
Japanese Carpentry
Seattle, WA